はじめに
.png)
どうも! みなため(@MinatameT)です。
この記事では、何か(例えば球体)が入るような四角いカゴを作る方法を解説します。カゴを作った後、カゴに重力を与えます。
座標は細かく指定していますが、完璧にマネする必要はありません。あくまで、ひとつの例です。
動作環境
・Windows 7
・Unity 2019
動画で理解する
動画の前に、カゴを置くための地面(Plane)と、メインカメラの座標の設定をしておきます。
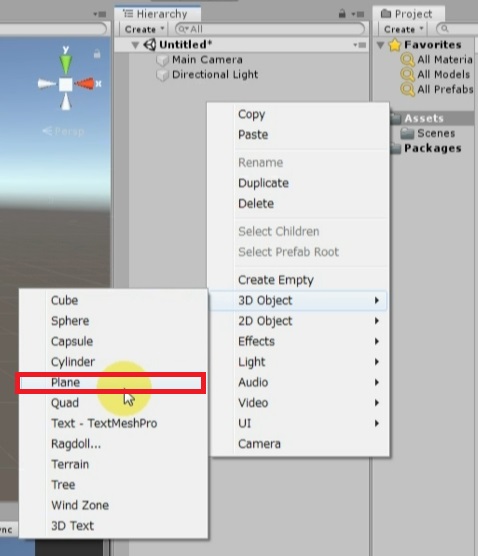
ヒエラルキーで右クリックし、「3D Object」>「Plane」を作成します。これで地面の作成ができました。
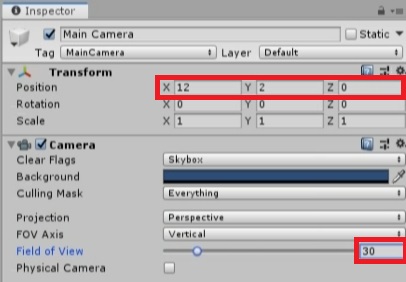
カメラの位置を変更するために、MainCameraのPositionのXを12に、Yを2に、Zを0に変更します。さらに、Field of Viewを30に変更します。
これはあくまで一例ですので、各自で微調整をしていただいても構いません。
さて、これで下準備は完了です。動画では謎の黒い球体が浮かんでいますが、これは無視してください。また、地面の色を変えていますが、これも無視してください。なお、動画の音声は出ません。
左クリックのエフェクトは水色で、右クリックのエフェクトはオレンジ色です。
画像で理解する
下準備
ヒエラルキーで右クリックし、「3D Object」>「Plane」を作成します。
※Planeの大きさや色は任意で変更してください。例えば、この動画ではScaleのXが10、Yが1、Zが10になっています。
MainCameraのPositionのXを12に、Yを2に、Zを0に変更します。また、MainCameraのField of Viewを30に変更します。
カゴの作成と設定
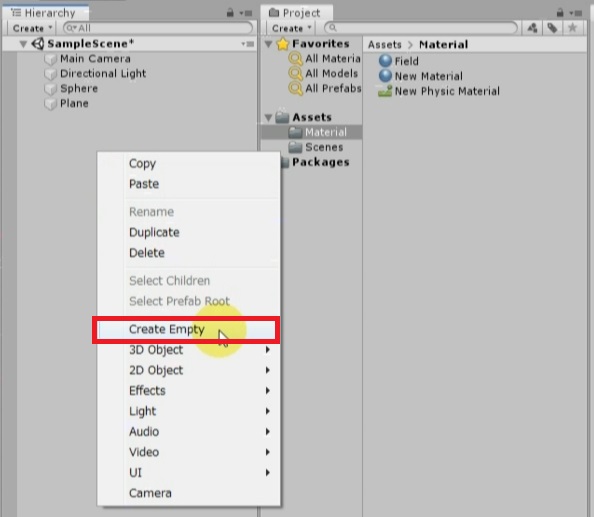
ヒエラルキーで右クリックし、「Create Empty」を選択します。
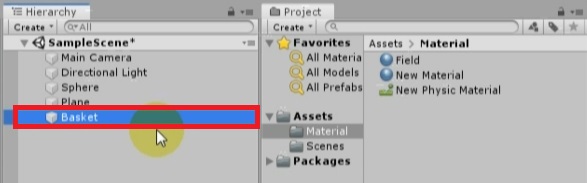
GameObjectの名前を「Basket」に変更します。ちなみに、バスケットはカゴという意味です。
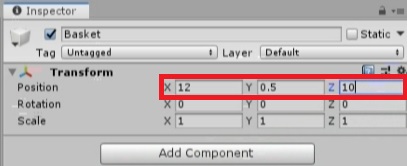
BasketのPositionのXを12、Yを0.5、Zを10に変更します。
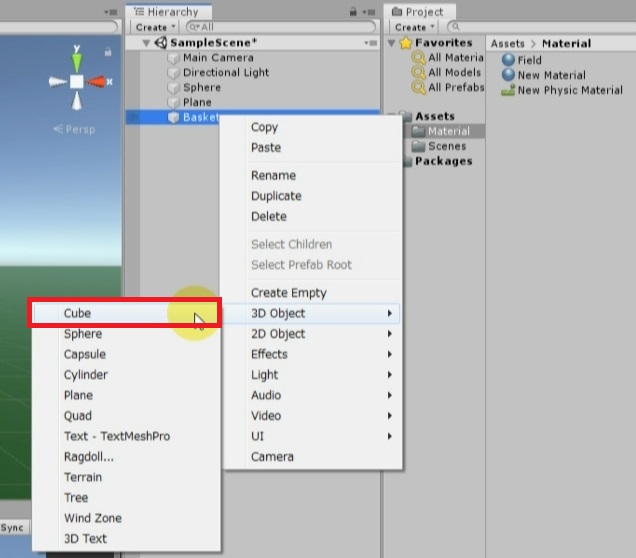
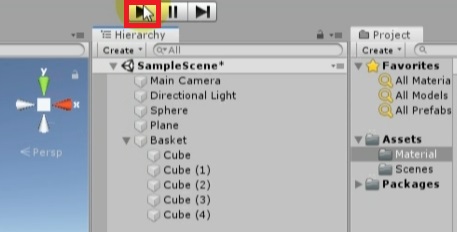
Basketを右クリックし、「3D Object」>「Cube」を作成します。これで、CubeがBasketの子オブジェクトになります。
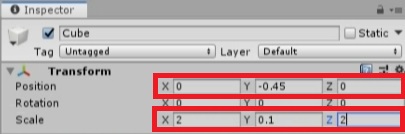
CubeのPositionのXを0、Yを-0.45、Zを0に変更します。さらに、CubeのScaleのXを2、Yを0.1、Zを2に変更します。
先ほどと同様に、Basketを右クリックし、「3D Object」>「Cube」を作成します。
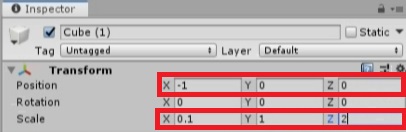
Cube (1)のPositionのXを-1、Yを0、Zを0に変更します。さらに、Cube (1)のScaleのXを0.1、Yを1、Zを2に変更します。
今まで同様に、Basketを右クリックし、「3D Object」>「Cube」を作成します。
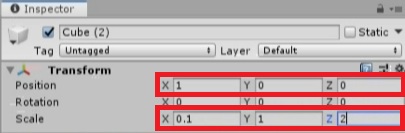
Cube (2)のPositionのXを1、Yを0、Zを0に変更します。さらに、Cube (2)のScaleのXを0.1、Yを1、Zを2に変更します。
今まで同様に、Basketを右クリックし、「3D Object」>「Cube」を作成します。
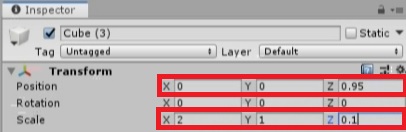
Cube (3)のPositionのXを0、Yを0、Zを0.95に変更します。さらに、Cube (3)のScaleのXを2、Yを1、Zを0.1に変更します。
今まで同様に、Basketを右クリックし、「3D Object」>「Cube」を作成します。
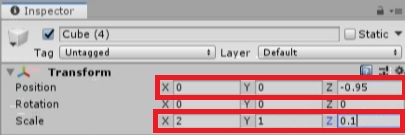
Cube (4)のPositionのXを0、Yを0、Zを-0.95に変更します。さらに、Cube (4)のScaleのXを2、Yを1、Zを0.1に変更します。
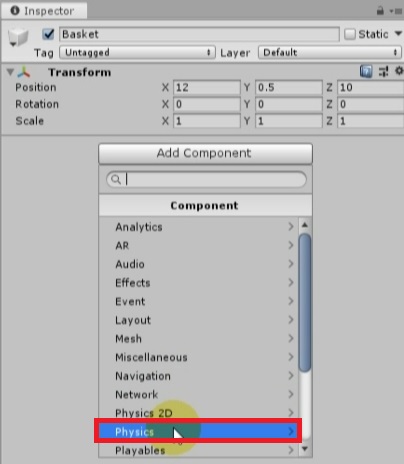
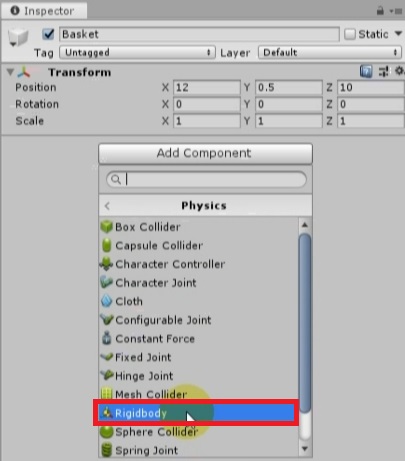
Basketに、インスペクターから「Add Component」>「Physics」>「Rigidbody」を設定します。
※親オブジェクトである「Basket」に設定しないと、子オブジェクト同士(Cube同士)がくっつかずにバラバラになってしまうので、注意してください。
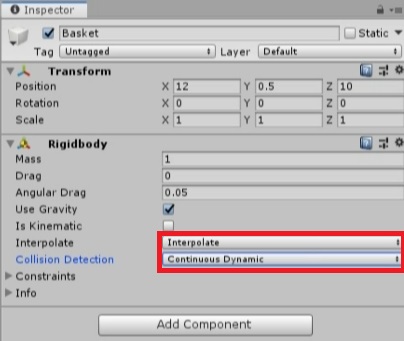
BasketのInterpolateを「Interpolate」に、Collision Detectionを「Continous Dynamic」に変更します。
テストプレイ(動作確認)
プレイボタンを押して、動作確認します。
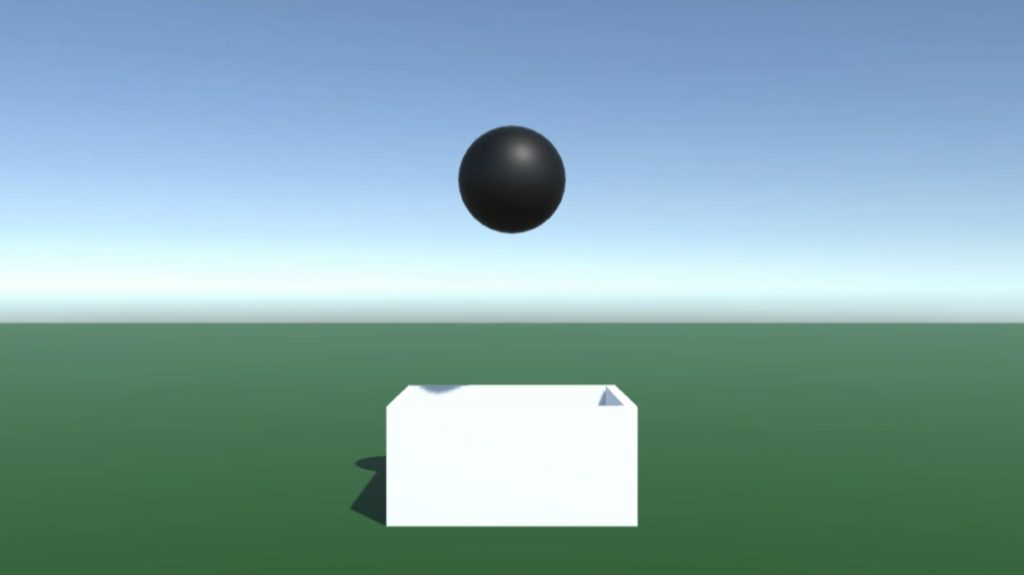
白いカゴができていることがわかりました!
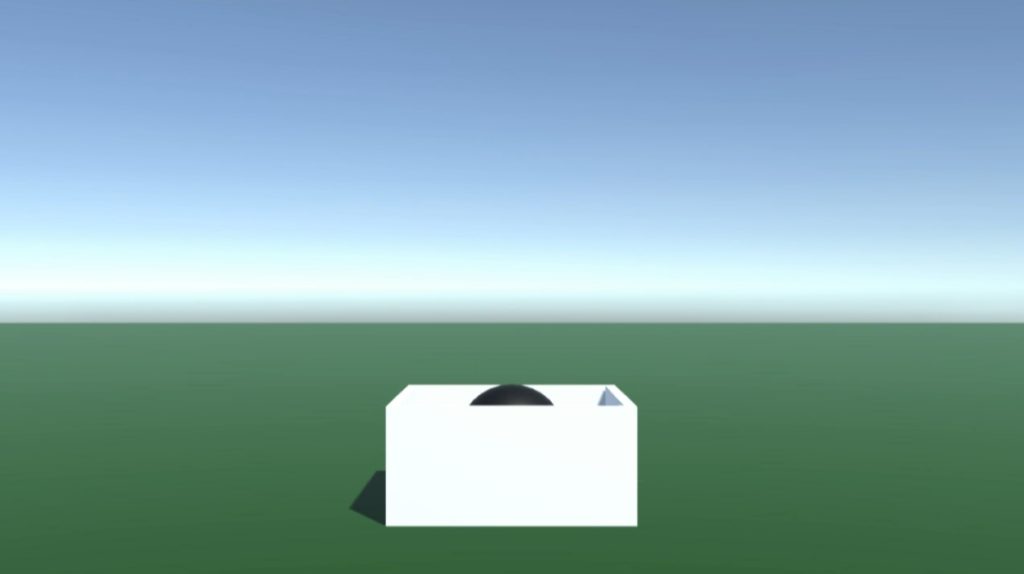
すると、黒い球体がカゴに落ちてきました。確かに、球体が入るようなカゴになっています!
ちなみに、この黒い球体の作り方は以下の記事で解説しています。
これで完成です。皆さん、お疲れ様でした。
.jpg)